Followers

Thursday, July 16, 2015

Portabella Pizzas

Do you ever feel like you are being watched?  Cause I do.  From the time that I come downstairs in the morning to the time I go to bed at night, I sense someone is watching me. If you have a pet, you may know this feeling.  As a matter of fact, as I was writing this sentence, I looked to see where my dog, Leyla, was, and she was standing in the doorway... just watching me type away.  I do not say this to make Leyla sound creepy; it is more sweet than anything.  She just turned a year old, and as she has grown, I have seen her mature from that awkward, adorable ball of fur to a loving and protective dog.  

Now, I know you are thinking, "Did I miss read the blog title?  You keep talking about your dog!  Where is the pizza?"  But, wait, I am getting there.  All Leyla ever wants is to be as close to Matt or me as possible.  When we are at the computer, she is at our feet; when we are watching TV, she is on the blanket next to us; when I am in the kitchen, she is standing under me.  Leyla asks for very little from us except for time.  This is one reason I try to make super quick meals during the week.  With us being gone all day, I know she wants to spend as much time with us as she can until we go to bed and do it all over again.  So, with that said, the meal I am sharing with you today is one of my new favorites.  It can be ready in 20 minutes tops!  This is my Portabello Pizza.

Portabella Pizza


Yes, I felt the stare.  This was Leyla's perch as she watched me make the Portabella Pizzas.

The first things first, I apologize for my excessive use of the Vignette setting.  It seems I went a little overboard.  I was trying a few new settings on my camera and the tweaking has just started!  Oh, and yes, the blog looks different.  It was time for a re-vamp!

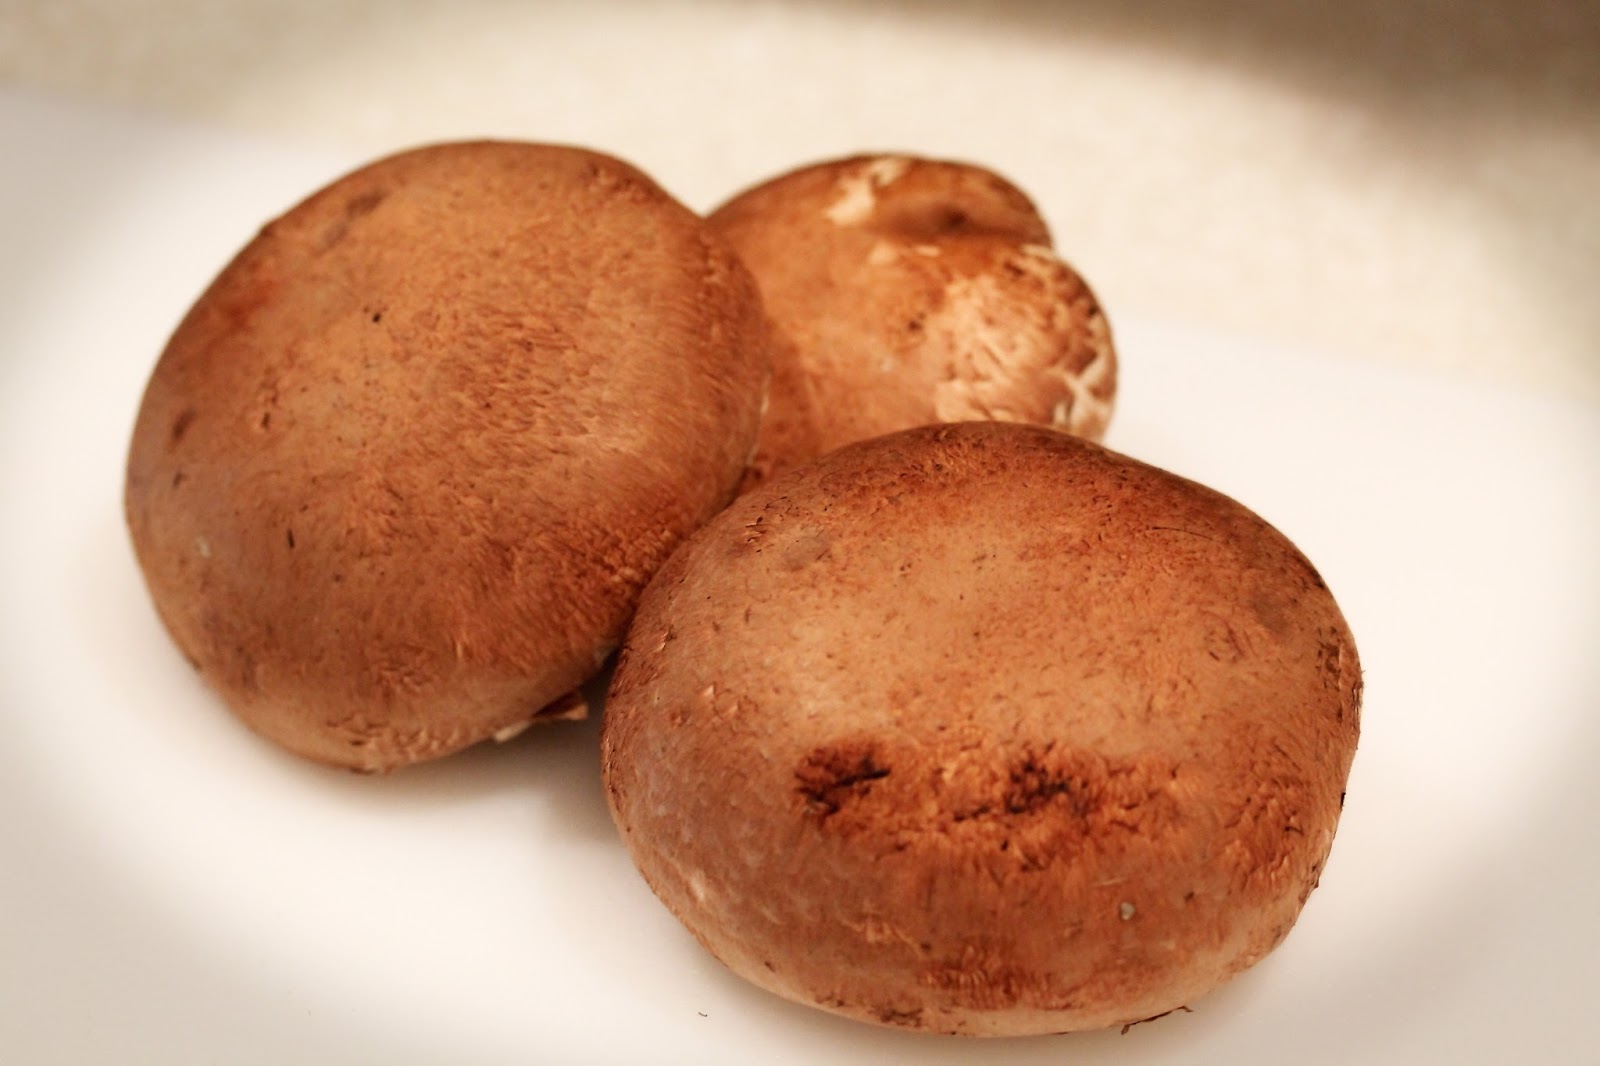
Okay, now we can talk food.  The first thing you need are portabella mushrooms.  I used three medium sized caps for two servings.  Wipe the caps with a damp paper towel to remove any grit.


Carefully remove the stems and the gills.  I say carefully because I was not, and one of my mushrooms broke in half.  Eh... no big deal if it happens, but when they are whole, it keeps the pizza sauce in place and not on the grates of your grill.  I just shrug my shoulders and contribute the mushroom breaking to my inhuman strength.


Drizzle the caps with olive oil and sprinkle with salt and pepper


Perhaps I should have mentioned this first.  Preheat your grill to medium heat about 350 degrees.  It should only take a few minutes.


Place your mushrooms on the grill, with the caps facing up.  In doing so, the edges of the mushroom get that charry, grill-marky flavor that we know and love so much.  Close your grill and allow to cook for 4-5 minutes.


While the mushrooms are cooking, cube 1/2-3/4 lb of fresh mozzarella.  In my opinion, I love the flavor of fresh mozzarella so much more than the shredded bag variety, but then again, the shredded bag variety has a lower moisture content and holds everything together nicely.  So, ultimately, your call!  I also have about 1/3 bag of turkey pepperoni and an almost empty jar of pizza sauce.  Collect your pepperoni, cheese, and sauce and take them out to the grill.


The mushrooms are ready to flip


OOOHHH....AHHHH.  Perfect!  The mushrooms are not entirely cooked through, but they are softened and charry on the edges.


Add your desired amount of pizza sauce to the mushroom caps


Add 1/2 of your cheese


Add a layer of pepperoni over the first layer of cheese, then add the rest of the cheese over the pepperoni.  The cheese's purpose, besides being amazingly delicious, is to help hold everything together.  It is equivalent to food glue... white, stringy, creamy glue.  Just a disclaimer, I never ate actual glue... that I can remember.


Close the grill and let everything heat through, about 5 minutes.  When you open the grill, the mushrooms will be perfectly cooked, the cheese will be all kinds of melty, and the pepperoni will have those crispy edges that make it so yummy.


Next, grab a sprig of basil for a garnish.  Btw, my basil is grown in one of those pallet planters that is hanging on our patio wall.  Matt made them last summer and the herbs love it!!  I do too!


Remove the pizzas from the grill


Stack your basil leaves on top of each other and roll them tightly like a cigar (that's what they always say on Food Network... why can't it be compared to something tasty like a Fruit Roll Up or something?)


Cut the basil in thin ribbons


I always serve my portabella pizzas with a salad, and tonight was no exception.  Feel free to substitute garlic bread.  


Ingredients:

3-4 portabella mushroom caps
olive oil
salt and pepper
1/4 jar of pizza sauce
1/2-3/4 lb of cubed mozzarella
1/3 bag of turkey pepperoni
5-6 basil leave, julienned (optional)

Directions:

Preheat your grill to 350 degrees.  Clean your mushrooms with a damp paper towel and remove the gills with a spoon.  Drizzle the mushrooms with olive oil and sprinkle with salt and pepper.  Place the mushrooms with the stem side (minus the stem), facing the grill.  Close the grill and allow the mushrooms to cook for 4-5 minutes.  

Open the grill and flip the mushrooms, with the stem side facing up.  Spoon your pizza sauce in as desired.  Add 1/2 of the mozzarella, then the pepperoni, and finally the last of the mozzarella.  Close the grill and allow everything to heat through about 5 minutes.  Remove the portabella pizzas from the grill and garnish with the basil.

Thursday, June 18, 2015

Red Pepper Jelly Pork Chops

Recently, Matt and I were lucky enough to have time off from school to take a vacation with my family.  We went to the beautiful, sunny Destin, FL.  Five whole days with my dad, mom, little brother and his girlfriend.  We had such a good time!  We packed the days full of hot sun, loud laughter, and scrumptious food.  My mom knew I had been missing home cooking, so she packed it full of my favorites: grilled chicken pasta salad, grilled pimento cheese sandwiches, and chocolate chip pancakes.  I don't think I was hungry once on the trip, but that never stopped me from eating the next meal that came along.  Have you ever noticed that moms always make food the best?  No one can ever make food quite like mom can.  The recipe I am sharing with you today is one of my mom's recipes.  I make this meal on a regular basis, and each time I fix it, Matt says it is his favorite recipe I have gotten from my mom.  This is my mom's Red Pepper Jelly Pork Chops.


But first, a few pictures from our trip.  If you are wondering, the "V" symbols we are throwing, stand for "Va-cay."  It was the theme of the week.  "I really shouldn't eat a fifth chocolate chip cookie, but... (insert hand symbol here) VA-CAY."  "I really should go run a few miles this morning, but (insert hand symbol here) VA-CAY."  You get the idea.


Jeff's girlfriend is a photographer in the greater Jackson area and has been forced (by her own accord, of course) to become our personal family photographer.  She photographed my grandmother's 90th birthday and is taking pictures of my parents for my dad's upcoming CD.  Her name is Anna Goodson, and she is amazingly talented.

Red Pepper Jelly Pork Chops


I have been trying to figure out what it is about these pork chops that makes them so delicious.  I think it is the saltiness of the pork, the sweet and spiciness of the jelly, and the sides.  These sides are perfect... sublime... singular to why these pork chops are so good.  The green beans are steamed and slightly crunchy to add texture.  The mashed potatoes are not just mashed potatoes; they are garlic mashed potatoes that are not too garlicky, not too bland, but just right!


The red pepper jelly may seem like a foreign ingredient to you.  The first time I made this recipe, I was worried I would not be able to find it in the store, but there it was on the top shelf of the jelly section.  Another thing people ask me when I make this recipe is how spicy the jelly is.  This jelly is not spicy at all.  Just savory with a little sweet and a lot of delicious.


Every time I make this recipe, I whip out my tried and true Milling cast-iron skillet.  I have no idea how old this skillet is, but it is one of my favorite cooking tools.  It heats the meat so evenly and is easy clean up.  I add 1 TBSP of olive oil to coat the bottom of the pan and crank it up to medium high heat.


Place the salt and pepper seasoned pork chops in the pre-heated skillet.  This recipe makes enough for four, but tonight, since it was just Matt and me, I only made two pork chops.  These are boneless pork loin chops, but my mommy always makes this recipe with bone-in 1 inch thick chops.  My mother is the epitome of a southern lady, but when this recipe comes around, along with the rest of us, she picks up the bone and nibbles it clean.  She follows this up with, "Well, they are finger-lickin' good!"


Cook the chops until they are brown on each side, but still pink in the middle.  This usually takes me about 5 minutes on one side and 3 minutes on the other side.


Remove the half cooked pork chops to a cutting board or a plate.  The chops will finish off cooking in the sauce.


Now it is time for the sauce!  Start with 2 TBSP of butter (the other TBSP I reserved for my mashed taters).


Add the butter to the skillet you cooked the pork chops in.  There will be a little olive oil left from cooking the pork, as well as the phenomenal brown tasty bits on the bottom of the pan.


Add 2 TBSP of flour to your melted butter.  We are making a roux (pronounced roo) to make our sauce nice and thick to coat our pork chops and be the gravy for our mashed potatoes.


Combine the butter and the flour and cook for a minute or so until it is combined.


Add 1/4 cup of white wine to deglaze the pan.  This is the point where you want to really get your whisk going to get the brown bits off the bottom of the pan and to prevent any flour lumps.


After the wine has evaporated (this happens almost instantaneously), add 1 cup of chicken broth and whisk, doing your best to remove any lumps.


Add 1/3 cup of your red pepper jelly.  It will start out looking kinda clumpy and weird.  Wait... be patient... ah there it is.  The jelly melts and creates this velvety consistency.  This is about the time where my mom adds jarred diced jalapenos.  If you don't like spicy stuff, omit this step.  Over my trip, I was asking my mom about the recipe and told her I frequently omitted the jalapeno.  At this point, my dad jumps in.  A little background: I have only ever seen my dad cook one time in my life, and it was a sandwich he heated on the stove.  Granted, it was a tasty looking sandwich, but lets just say, my dad is not known for his cooking abilities.  He said, "Oh, Emilee, you cannot leave the jalapeno out!  It just adds that little umph you couldn't get otherwise."  If my dad speaks up on something food wise, it must be important.


Continue to whisk the sauce until it thickens and coats the whisk when you withdraw it from the pan.  This usually takes 3-4 minutes.


Once the sauce is thick, return the chops to the pan for 5-10 minutes until cooked through.  

Lets talk sides.  You may choose to make something besides what I recommend.  This would be unwise.  The reasons are threefold.  1. The textures work perfectly, and you cannot improve upon perfection.  2. They are easy to cook while you are making the pork chops, and they do not need a lot of attention.  And 3.  Because my Momma told you so.  The End


Steamed Green Beans: trim the ends of the beans to remove any fibrous parts.  Place in a steamer basket (or buy the bagged beans from the produce department that you can steam in the microwave).  Steam the veggies until tender but still crisp, about 5-6 minutes (or as the bag directs)


Garlic Mashed Potatoes: These three potatoes make four servings of mashed potatoes.  These are Russet potatoes  


Peel your potatoes and remove the skin from your garlic clove.  Note that only one medium garlic clove was used.  That one clove of garlic is the perfect amount for these potatoes... no more, no less.  


Dice your potatoes and add them to a pan of hot water.  I always add the potatoes before the water starts boiling so I do not injure myself.  Here is the key.  Are you ready?  Add the garlic clove along with the potatoes to the water.  The garlic clove will cook along with the potatoes and the harsh garlic flavor will be cooked out.  You will be left with just enough garlic flavor to know it is there, but not the garlic breath for hours.


After boiling the potatoes for 15 minutes or so, strain them.


At this point, I return the potatoes to the pan, but a bowl would work as well.  I just hate doing dishes.


Add 1 TBSP of butter, 1/4 cup of milk, and salt, and pepper to taste.


Using an electric mixer, whip the potatoes until smooth.  If you notice the potatoes are a little dry, you can always add more milk.  If the potatoes are a little wet, let them rest for a few minutes, and they will thicken up.


Now assemble your meal.  This recipe is my go-to comfort food.  It not only feeds my belly, but it also feeds my soul.  I promise you will not regret making it!

Red Pepper Jelly Pork Chops
Ingredients:
Pork Chops:
4 pork chops
1 TBSP olive oil
2 TBSP butter
2 TBSP flour
1/4 cup white wine
1 cup chicken stock
1/3 cup of Braswell's Red Pepper Jelly
1 TBSP diced canned or jarred jalapeno (optional)

Mashed Potatoes:
3 Russet or Yukon Gold potatoes
1 clove of garlic
1/4 cup of milk
1 TBSP butter
Salt and Pepper

Green Beans:
Green Beans
Salt (optional)
Butter (optional)

Directions:

Bring a medium pot of water to boil.  Peel the potatoes and remove the skin from the garlic clove. Dice the potatoes and add them, along with the garlic clove to the water.  Cook the potatoes until they are fork tender, about 15 minutes.  Strain the potatoes and return them to their pan.  Add the milk, butter, and salt and pepper.  Use a hand mixer to whip the potatoes and garlic clove until smooth.  

Preheat a large skillet to medium high heat.  Add the olive oil.  Season the pork chops with salt and pepper, and place them in the skillet.  Cook on one side for 5 minutes until brown and flip.  Cook until browned about 3 minutes but pink at the center.  Remove the pork chops from the pan.  

Melt the butter in the preheated skillet and add the flour.  Whisk the two until a paste is formed.  Add the white wine to deglaze the pan.  Once the wine has evaporated, add the chicken stock.  Whisk the sauce until smooth.  Add the red pepper jelly and continue to whisk until it is incorporated.  If you are adding the jalapenos, do so at this point.  Continue to whisk the sauce until it has thickened, about 3-4 minutes.  Place the par-cooked pork chops in the sauce and turn the heat to low.  Continue to cook for 5-10 minutes until the chops are cooked through.

Trim your green beans of their fibrous ends.  Use a small pot with 1 inch of water and a steamer basket.  Bring the water to a simmer.  Add the green beans to the basket and steam for 5-6 minutes until bright green and crisp.  Season with salt and butter if desired.

To assemble your plate, arrange your green beans and add a spoonful of garlic mashed potatoes.  Place a pork chop over the mashed potatoes and spoon the red pepper jelly over the top.  Enjoy!


Sunday, February 15, 2015

Sausage Tortellini Soup

As promised, I have another fantastic weeknight meal for you!  I have to admit, despite our mild winters here in south Florida, I have become a soup junkie this year.  I have soup at least once a week.  If you ever want to stretch a buck and feed a lot of people, soup is the way to do it.  Also, when I make it just for Matt and me, I can freeze half and know that some time in the near future, I can get a night off from cooking.  As much as I love to come home and cook a nice meal, it is a liberating feeling to know that I have a back up plan if work runs late.

This soup has similar flavors to my Italian Wedding Soup with Parmesan Crisps, but it is way faster and easier.  This is my Sausage Tortellini Soup:

Sausage Tortellini Soup


I really cannot say enough how satisfying soup is.  No matter where you are, it makes you feel toasty and happy inside.  


Bring a large, deep pot to medium high heat. Brown your sausage.


After your sausage has gotten brown but not yet crispy, add 2 sliced carrots.  Saute for about 3-4 minutes until the carrots soften and the sausage gets that yummy brown crunch on the outside.  At this point, drain the excess fat from the pan.


Pour in 6 cups of chicken stock (or a quart of chicken stock and 2 cups of water if you don't want to buy 2 boxes of stock).  Bring the stock to a boil.  Sorry for the very unappetizing picture, but stick with me!  We are not done yet.


Measure out 4 cups of spinach and 2 cups of three cheese tortellini.  Another great option for this soup would be to substitute kale for the spinach.  Either would be fabulous.  Make the recipe your own!


 Turn down the eye to medium low heat and add the tortellini to your soup pot.


Next goes the spinach!  Popeye would approve


Woah... where did the spinach go? Once the spinach has wilted, add 1/4 cup of shredded Parmesan cheese


Take a few sprigs of parsley.  I prefer Italian flat leaf parsley, but my curly parsley was in full bloom and just begging to be used.


Chop up your parsley, and add it to the soup 


Wow, what a transformation!  The ugly duckling has become a swan.  Stir everything until it is incorporated.


Dish your soup into bowls, and grab a spoon.  This is one easy, one-pot meal!  I hope you like it as much as I enjoyed eating it.

Ingredients
1lb of ground pork sausage
2 carrots, peeled and sliced
6 cups of chicken broth
4 cups packed spinach
2 cups of three-cheese tortellini
1/4 cup of shredded Parmesan, plus more for garnish
2 TBSP of fresh parsley 

Directions

Bring a large pot to medium-high heat, and brown the sausage.  Add the carrots and cook for 3-4 minutes.  Drain the excess fat from the pan.  Pour the chicken broth over the sausage and carrots.  Bring the broth to a boil.  

Reduce the heat to medium-low and add the tortellini and spinach.  Cook for about 4 minutes until your tortellini has warmed in the center.  Chop your parsley, and add it along with the Parmesan cheese to your soup.  Stir until it is incorporated.

Ladle into bowls, and enjoy!  Remember, soup is even better the next day, so get your lunch box excited.