Followers

Monday, December 14, 2015

Spaghetti ai di Mare

A few weeks ago, I posted a picture on Facebook of one of Matt's and my date nights in where I made a seafood pasta.  I got so many requests for the recipe, I decided it was time for another blog post.  Don't be afraid of the name!  I know it sounds intense, but I promise it is not a difficult dish.  You got this!!

Spaghetti ai di Mare


If this picture doesn't make you want to kiss someone, then I don't know what does!  One of the first people that contacted me after I posted the picture on Facebook was our dear friend, Susan.  Susan is in Matt's class, and we kinda adopted her once we moved to Naples.  She helped me create this beautiful meal for our husbands.  It really is a stunner for entertaining.  The dish serves 4 easily!

Before I show you how to make the seafood sauce, I made some garlic toast and spaghetti to be waiting in the wings until the sauce is finished.  You want all of your focus to be on the sauce so the seafood does not get overcooked.


Take 1-2 baguettes and slice it at an angle into 1/2 inch pieces.  


Coat the bottom of a skillet with olive oil (about 3 TBSP), layer the toasts with the cut side down to allow the oil to sink in slightly, then flip the toasts to coat the other side.  You can also use a brush to apply the olive oil to both sides of the toast, but I found this method to be a little faster.


Once the first side is toasted, flip the bread to get the other side nice and toasty.  Remove the bread from the skillet and start a second batch until the toasts are done.


While the bread is still warm, cut a garlic clove in half and rub both sides with the garlic juices.  This makes the bread have a garlicky taste that is not overwhelming, but just right!  Look at Susan go!  Go Susan! Go!


Cook some spaghetti according to the package recommendations.  I thought this was how much we needed for 4 people.  I was wrong.  This was enough for 8... maybe one day I will learn.  Once the spaghetti is cooked, strain in a colander and rinse with cold water to stop the cooking process.  The sauce will heat it up when you are ready.

Reserve 1 cup of pasta water in case the sauce is too thick.


It's time to prep your seafood.  When I first started cooking, seafood really intimidated me, so it is understandable to feel apprehensive.  That is what I am here for!  Let me share a few pearls of seafood wisdom I have found out over the years.

Take 1/4 lb of scallops.  Bay scallops would be great in this recipe because they are small, but I had some regular sized scallops on hand so I used those instead.  Scallops have this tough, muscley portion that comes off easily.  Trust me, you don't want to eat it.  It is rubbery and not soft like a scallop should be.


Cut each scallop into quarters


Woah...what is that!?!  This is squid.  You make think, "Ew, squid," but don't think of it as squid.  It sounds much more appetizing as calamari.  I just tell you this because if you go to your fish market and you ask for calamari, they will direct you to the frozen, pre-breaded stuff.  What you need are squid tubes.  

I used 1/2 lbs of squid tubes which I cut into 1/2 inch rings.  Lay the squid on your cutting board, as shown, and cut a vertical line down the length of the tube.


These are mussels.  They look similar to clams, but are longer, skinnier, and have a black shell.  These will come alive...yes...alive.  And you should not get them if they are not alive.  They won't look alive, cause they don't do much.  The ways you can tell if they are alive is that once you cook them they open.  If they do not open, throw them away.  

The only thing you need to keep in mind with mussels, besides the alive thing, is they have beards.  Yes, beards.  Pretty cool, huh?  Yes cool on a mussel; no, not cool in your mouth.  The beards should be removed before you cook the mussels.  I usually get Matt to do it, because my fingers are not always strong enough.  If you do not have a handy Matt, then place the beard between your thumb and the flat surface of a kitchen knife (the not sharp part) as close to the mussel as you can get, and turn the kitchen knife at a 90 degree angle to help leverage the beard out.

Susan asked the very good question of, "What if you eat a beard?"  I told her that nothing would happen, but it would be like eating a feather off of a chicken wing.  It won't hurt you, but may not be very pleasant.  Keep in mind that not all of the mussels will have a beard, but just be on the look out for them.


All of your seafood is prepped!  I also grabbed 1/2 lb of large shrimp.  Now for the easy part!  The sauce!


List of ingredients: 1/2 bottle of 750ml white wine, 4 oz of tomato paste, 2-3 garlic cloves, 3 TBSP of butter and olive oil, 1/4 cup of chopped Italian parsley, salt, and red pepper flakes


Finely dice your garlic cloves.  I know, I know!  Garlic for date night!  But when you are both having it, the garlic cancels itself out, right?


In a large skillet, melt 3 TBSP of butter with 3 TBSP of olive oil


Add your garlic and saute at medium high heat for 1 minute until it becomes fragrant


Add the 4 oz of tomato paste.  The can I had was 6 oz so I used about 2/3.


Heat the paste until it begins to loosen, about a minute or so


Add 1/2 of the bottle of white wine, and bring the mixture to a boil to allow for the alcohol to cook off.  This takes about 3-4 minutes.


Add the mussels.  The mussels take the longest to cook, so they go in first by themselves.  Turn down the heat to medium.


Cover the mussels and allow them to cook for 2 minutes


Add the shrimp and stir in the sauce.  Allow both to cook for another minute.


Add the calamari and scallops.  


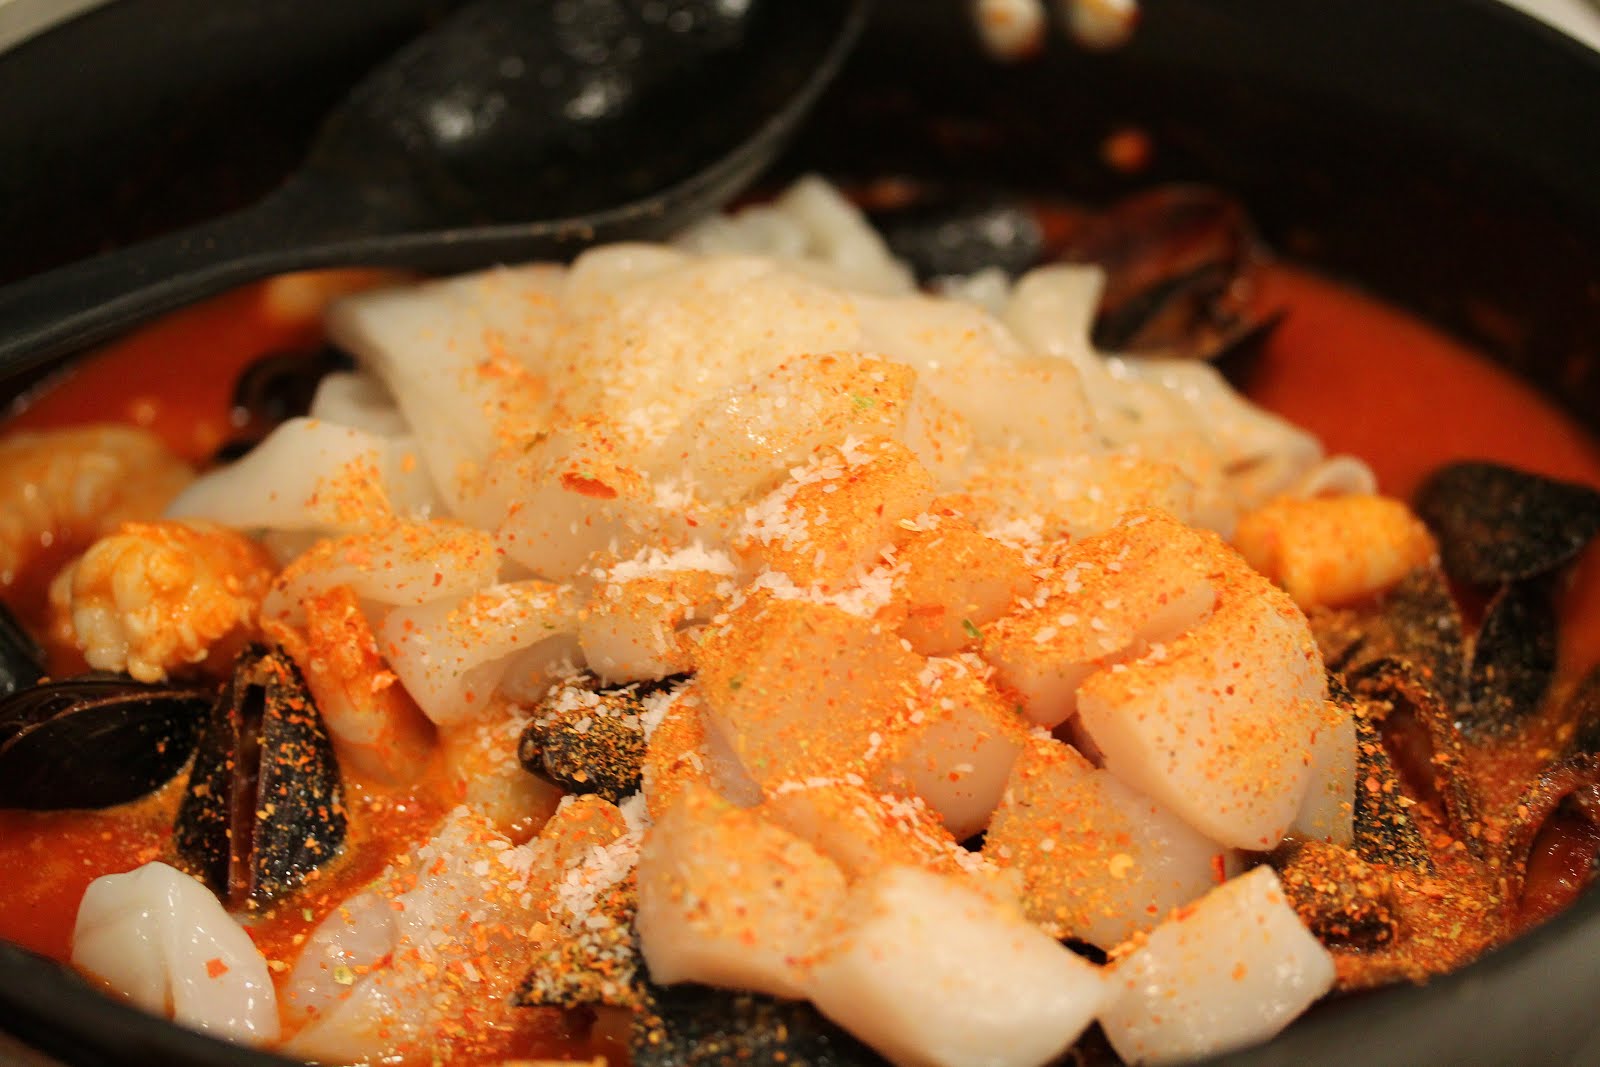
It is time to season the sauce.  Add a pinch of salt and crushed red pepper flakes to your liking.


Stir the seafood in to coat in sauce.  Cook everything for 2-3 minutes.  If the sauce is too thick, add a splash of reserved pasta water until it becomes like a soup consistency.  Wow!  So you saw how fast the sauce cooks.  This is why everything needs to be prepped prior.  You also do not want this sitting on the stove for long or all of the seafood gets over cooked.


Add 1/2 of the chopped parsley.  Isn't that just one of the most beautiful things you have ever seen?  Susan is a genius with the parsley.


Dish it up!  I placed a bed of spaghetti, heaping spoonfuls of seafood and sauce, then garnished with the garlic toasts and the remainder of chopped parsley.


I have to give a shout out to my fur baby, Leyla.  Thanks for always keeping me company in the kitchen!  Don't even try to tell me that dog is not smiling.  


Since the weather is practically perfect right now in Naples, we had an al fresco dinner.  Cheers to good friends, good food, and a great time!

Ingredients

Garlic Toasts:
1 medium or 2 small baguettes
Olive oil
1 clove of garlic, cut in half horizontally

Spaghetti ai di Mare:
1/2 lb spaghetti, 1 cup of cooking liquid reserved
1/2 lb large shrimp, deveined and shells removed
1/2 lb mussels, de-bearded
1/2 lb squid tubes cut into rings
1/4 lb of bay scallops or regular scallops cut into quarters
2-3 garlic cloves, finely diced
1/2 750ml bottle of white wine
4 oz of tomato paste
Pinch of salt
Red pepper flakes to taste
1/4 cup of chopped Italian parsley

Directions

Cut the baguette into 1/2 inch thick pieces.  Coat the bottom of a skillet with olive oil (about 3 TBSP), layer the toasts with the cut side down to allow the oil to sink in slightly, then before they toast, flip the toasts to coat the other side.  Allow the bread to toast, flip them again to allow the other side to toast.  Remove from the pan and rub the cut side of the garlic clove on both sides of the toast.  Repeat the process as necessary.  Set the toasts aside until ready to serve.

Cook 1/2 lb of spaghetti according to the package's directions.  Reserve 1 cup of cooking liquid.  

Prep seafood.  In a large skillet over medium high heat, melt 3 TBSP of butter with 3 TBSP of olive oil.  Add the garlic.  Saute for 1 minute until fragrant.  Add the tomato paste and heat to allow oil to combine and loosen the paste.  Add the wine and bring to a boil.  Allow the alcohol to boil off by cooking sauce for 2-3 minutes.  Lower the heat to medium.  Add the mussels and cover for 2 minutes.  Add the shrimp and stir to cover shrimp with sauce.  Cook for 1 minute.  Add the scallops, squid, salt, and pepper.  Stir to cover the seafood with sauce and allow to cook for 2-3 minutes.  If the sauce is too thick, add some reserved pasta water to make it a soup-like consistency.  Add 1/2 of the chopped parsley.  Stir to combine. 

To serve, place a nest of spaghetti in the bottom of an individual serving bowl.  Ladle seafood and sauce over the spaghetti.  Garnish the dish with parsley and garlic toasts.  Enjoy!


Tuesday, September 8, 2015

Vietnamese Summer Rolls

I am so excited to share this blog post with you!  I am typically excited about any blog post, but especially this one.  The recipe I am sharing today is one that I received from my dear co-resident, Sara.  Since having moved to Naples, I have been exposed to so many new people with different backgrounds than myself.  Thankfully, we all share the love of good food, so I have been collecting recipes along the way that I am adding to my Naples cookbook.  That's right!  I am compiling recipes that I receive from the amazing people I have met here, so anytime I make the recipe, I am reminded of them.  So sweet, right?  And, of course, I will be sharing the book with these lovely ladies you see in the picture below (plus Lory who is behind the camera).

When we first started residency in Naples, we decided to have a weekly girls night.  With all of us moving from various parts of the country, we knew next to no one here.  We quickly established what we call "Our Naples Family."  I feel blessed beyond measure to have such sweet, smart and beautiful girlfriends to spend these two years with.  

Like I said, we have a weekly girls night that started as The Bachelor Night, but has now progressed to themes such as, but not limited to: breakfast for dinner, movie nights, and recipe sharing.  Tonight's girls night was learning how to make Summer Rolls.  The recipe makes quite a few rolls, so bring a crowd.  Besides, eating is always more fun when you are sharing it with a group!

Vietnamese Summer Rolls 


We had quite a spread!  In addition to the summer rolls, we also made Mandu (Korean pot sticker) which were to die for.  I can't take credit for that recipe, but I would highly recommend making them.  They were some of the best dumplings I have ever had!  Click here to find the link to the blog we got the Mandu recipe from.


Back to the summer rolls!  These guys are super easy to make.  We used rice paper wrappers, vermicelli rice noodles, shredded carrots, shredded cucumber, bean sprouts, lettuce, shrimp, cilantro, mint, and basil.
The rice paper comes in thin disks at your local Asian market, but everything else can be found in most standard grocery stores.


We started by heating water in a kettle until it is warm.  We used a shallow plate to hold the warm water so we could dampen the rice paper disk to make it more flexible.  The first few times I tried to make my roll, I made the mistake of getting the rice paper too wet, and it became sticky and difficult to handle.  I placed the disk in the water for 2 seconds, flipped it for 2 more seconds, and took it out of  the water.  The disk will become more flexible as you go.


Take your rice paper out of the water and place it on your work station such as a plate or cutting board.  I start with laying a few leaves of cilantro in a line. 


Next for the shrimp!  What we did was boil the shrimp in water until they a fully cooked (about 4 minutes) and blanch (dunk) them in cold water to keep them from over-cooking.  After the shrimp have cooled, cut the shrimp in half length-wise.  This step was completed during our prep time, so now we can assemble everything.  Oh! I almost forgot!  I like putting the pink side of the shrimp towards the rice paper.  Once it is rolled, you can see the shrimp from the outside so everybody knows it is a shrimp summer roll.


Following the shrimp, I added a leaf of romaine lettuce, shredded carrots, thinly sliced cucumber, and fresh bean sprouts.  One thing I had a problem with in the past is over-filling the roll.  I had to keep reminding myself that I was not making a burrito.  You just need a little bit of each ingredient!


On top of my veggies, I arranged some fresh basil and mint leaves.  In the past when I have made summer rolls, the thought never occurred to me to add mint and basil.  Let me tell you, I will never not add them from here on out!  They add a fresh, aromatic flavor that is unmistakable in these rolls. 


And lastly, I grab a small handful of rice noodles.  The rice noodles give the rolls some substance to them, cause Hello, we can't just eat vegetables and two shrimp!  At least that's not how I roll...yea... pun intended.  I could not help myself.


Alright! so we have made it to the rolling part.  I fold the left and right side of the wrapper over so nothing falls out the ends.  Next, I grab the end farthest from me and bring it towards me, covering the filling.  Lastly, I roll everything towards me until the roll is sealed.


Eek!  That's all it takes!  Look how gorgeous the cilantro and the shrimp look.  There is no mistaking what is going on in that roll.  Even little Jaxie wants some!


Every summer roll needs a good dipping sauce, and this one could not be easier.  We used 2 parts Hoisin (Asian barbecue sauce found on the International aisle of your grocery store) and 1 part creamy peanut butter.  We, then, added a little warm water to thin the sauce.  Do so to your liking!


Dip and enjoy!!!


And, seriously, don't forget about the Mandu!  Look how amazing they turned out!  This was one of the best girls nights we have had.  It was like craft night, but you got to eat your craft afterwards.  Does it get any better than that??  Grab your best girls (or guys) and get to cookin'!

Ingredients

Summer Roll:
Rice paper disks
Cilantro
Mint
Basil
Large shrimp, cut in half longways
Romaine lettuce leaves with rib removed
Shredded carrots
Shredded cucumber (seeds removed)
Bean sprouts
Vermicelli rice noodles

Peanut dipping sauce:
1/2 cup of Hoisin sauce
1/4 cup of creamy peanut butter
1-2 TBSP of warm water

Directions

Warm some water and make the peanut dipping sauce by adding the Hoisin sauce and peanut butter to a small mixing bowl.  Add the warm water until it has reached the consistency you want and the mixture is thoroughly combined.

  Add warm water to a medium sized mixing bowl and place your Vermicelli noodles in the water.  Drain and remove the noodles to a plate once they have softened.  Arrange all of your vegetables, herbs, noodles, and shrimp assembly line style.  

Pour some of the warm water in a shallow, large diameter bowl or plate.  Dampen your rice paper wrapper on each side.  Place the wrapper on a work station (plate, cutting board, etc).  Lay a few leaves of cilantro in a horizontal line in the center of your wrapper.  Place the pink side of the shrimp over the cilantro leaves.  Put a leaf of Romaine lettuce over your shrimp and add the shredded carrots, cucumber and bean sprouts.  Lay a few leaves each of mint and basil over the veggies.  Top everything off with a small handful of Vermicelli noodles.  

Fold the right and left edges of your wrapper over the sides of the veggies.  Take the top edge and fold it over the veggies towards you.  Gradually roll the wrap towards you and allow the bottom edge of the wrapper to seal your summer roll.  Dip the summer roll in the peanut dipping sauce and eat to your heart's content!


Tuesday, July 28, 2015

Hershey Bar Pie

Yay!! Dessert blog!!  Let me give you a little insight into my soul.  I am and will always be a girl that craves salty food.  My weaknesses are as follows: popcorn, chips, and french fries.  Don't get me wrong; I do enjoy the occasional sweet thing, but it is not what drives me to eat.  Please do not hate me.  I know what I just confessed is not a popular opinion, which brings me to my dear, sweet-toothed husband.  In Matt's world, he eats a small dinner, for sake of argument, lets call it an appetizer, so that he can be rewarded for eating all of his dinner by having a big dessert.

A typical dessert for Matt would be Oreos with a glass of milk, ice cream, or his favorite...pie.  My sweetie loves pie.  He loves talking about pie.  Well, of course, there is apple pie, then pumpkin pie, oh yes, and pecan pie, but, wait! don't forget about blueberry pie.  The list goes on and on.  He then asks me, "What pie is your favorite?"  I reply, "Chicken pot pie."  Matt then lets out a really long sigh, shakes his head, and says, "You just don't get it."

But in honor of my love, I decided to make a pie.  The pie recipe I am about to share with you is my favorite dessert pie in the world.  My mom only makes this pie on special occasions, so for all of these years, I believed it to be a labor intensive process.  I could not have been more wrong! It is only five ingredients, and easy as pie to make (see what I did there?).  This is my mom's Hershey Bar Pie.

Hershey Bar Pie


If you like chocolate, you are going to love this pie!  It only takes 5 ingredients: 1 graham cracker crust, 6 Hershey bars with almonds, 10 marshmallows, 1/2 cup of milk, and an 8 oz container of Cool Whip.


Take the marshmallows, and put them in a medium sized pan 


Add the 1/2 cup of milk


and lastly, the Hershey bars with almonds.  Turn the eye temperature to medium low heat.  This step is key to having a yummy pie.  If the pan gets too hot, the chocolate and the milk can burn.  The process of melting the chocolate and the marshmallows took about 15 minutes because I did not want to risk anything burning.


Once everything is melted, the mixture will look something like this.


The consistency will be slightly thinner than pudding and more like a cake batter.


Pour the chocolate into the prepared pie crust.  Try to stir the almonds around to evenly distribute.  I had a friend ask me if they could use chocolate bars without the almonds.  I am almost 100% positive that you can, but once the pie is "set," it is has the soft texture of pudding.  I think the almonds make the pie delicious by adding that crunchy, toasty, nutty texture, but feel free to buy regular Hershey bars.

Now, pop the pie in the fridge for at least an hour, preferably 2-3 hours.  Here's the fun part!  That spatula you used earlier is ready for you to lick it clean.  There is nothing raw in this pie, so no guilt on licking the spoon.  Trust me, you know you want to.


After the pie has cooled completely in the fridge, slather an 8oz container of Cool Whip over the top, and dish you up some Hershey Bar Pie.

Ingredients
1 prepared graham cracker crust
6 Hershey bars with almonds
10 Marshmallows
1/2 cup of milk
8oz container of Cool Whip

Directions

Unwrap your Hershey bars.  Heat a medium pan over medium low heat.  Add the marshmallows, milk, and Hershey bars to the pan.  Stir until everything is combined and melted, about 15 minutes.  Pour the chocolate mixture into the prepared crust and try to distribute the almonds evenly.  Place pie in the fridge for 2-3 hours or until cooled completely.  Use a spatula to slather the pie with the Cool Whip.  Enjoy!